What is an EOS project?
Up to version 2.4 of the EOS template this step was not necessary. Each gallery was self-sustaining which means it contained all files which were needed to run the gallery. You could move the output folder to any location and the gallery continued to work. Starting with version 2.5 a shared folder is used to hold all common files, like settings, images, style sheets and static HTML files. This has the big advantage that you can change the settings in one file and all your galleries are automatically updated. Furthermore less server space is used and the galleries load faster.
Naming conventions
Before you get confused with all the folder names read the following explanation:
- source or input folder
That is the directory where all your original images reside. If you use a database driven application like iView or IMatch this is not necessarily a directory. Even BreezeBrowser introduced a new feature which allows you to build a web gallery from shortcuts (links to images). For simplicity we always speak of a folder, regardless it's a virtual one or not.
- template folder
The location of the template directory depends on the image application you use. You do not have to create that one. It usually already exists with some standard templates in it. Refer to the documentation of your application to find out more.
- EOS template folder
This is a subfolder in the template directory which holds the EOS specific files. It's name is "EOS" by default and it comes with the installation ZIP file.
- project folder
The EOS project folder must be created by yourself. It contains all common files which are shared between your EOS galleries. There is more information below on this page.
- common or shared folder
This is a subfolder in the project directory which holds the shared files. It's name is "eoscommon" by default and it comes with the installation ZIP file.
- destination or output folder
This directory is being created automatically be your image application. Usually you can enter it's location in the HTML dialog. It contains all HTML files and web-sized images (incl. thumbnails). If you do not rename it before uploading it to the web server this will be the name your clients will see in the gallery's web address.
Example output folder names:
• "2005-06-30" → http://www.mydomain.com/events/sport/tennis/2005-06-30/
• "Tom & Jerry" → http//www.myphotography.com/Tom%20&%20Jerry/
Note that blanks will be replaced with %20 in the web world. Underscores are often used instead since it looks much cleaner.
The following chart shows the complete setup:
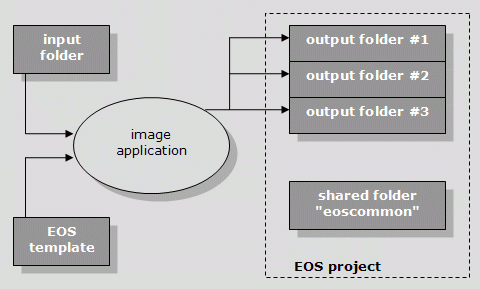
Note that only the project folder needs to be copied to the web server. All other directories are only locally necessary.
Create the EOS project folder
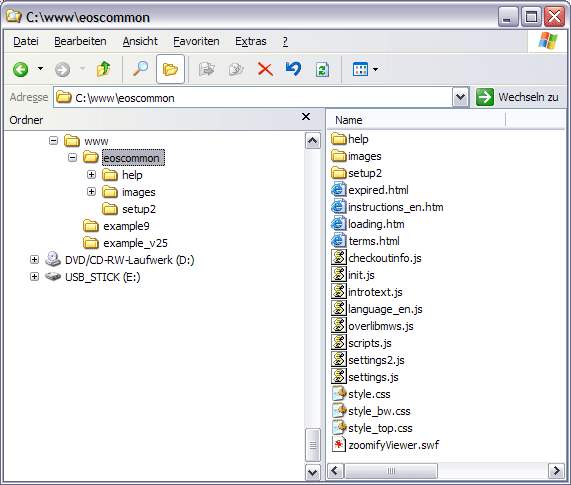
This step is pretty simple since you can freely choose the name and location of the EOS project folder. Usually you already have a mirror of your website on your local computer. If you do not then it is highly recommended to duplicate the files and folder structure locally. In the example below the project folder is called "www". It contains the shared folder "eoscommon" and two output/destination folders called "example9" and "example_v25" which are two sample web galleries.
It is not relevant where you place the EOS project folder on your webserver. Note that the original images are not located within the EOS project folder.
Link the EOS template to the project folder
If you have followed the instructions you can skip this step. That means, if your output folder and the "eoscommon" folder are at the same level in the directory tree you do not need to edit the file "dirsetup.js"!
If your output folder is somewhere else you need to specify in the template where the project folder is located. This is done in the file "dirsetup.js" in the EOS template folder. Open the file in a text editor and look for the variable common_DIR which appears two times. Follow the instructions in this file. It also includes some example settings. During the gallery generation process this file gets automatically copied into the output folder.
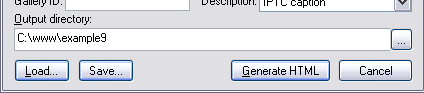
Choose the project folder as output folder
The setup of the EOS project is now completed. When you generate a new gallery make sure that the resulting gallery is being created in the project folder. Check your application's documentation if you don't know how to define the output folder. Here are two example screen shots for BreezeBrowser and JAlbum:

Top
|